EasyScore can be connected to any physical on-field scoreboard.
Next are instructions for setting up a Daktronics scoreboard coupled with an All Sport® 5000 Series controller
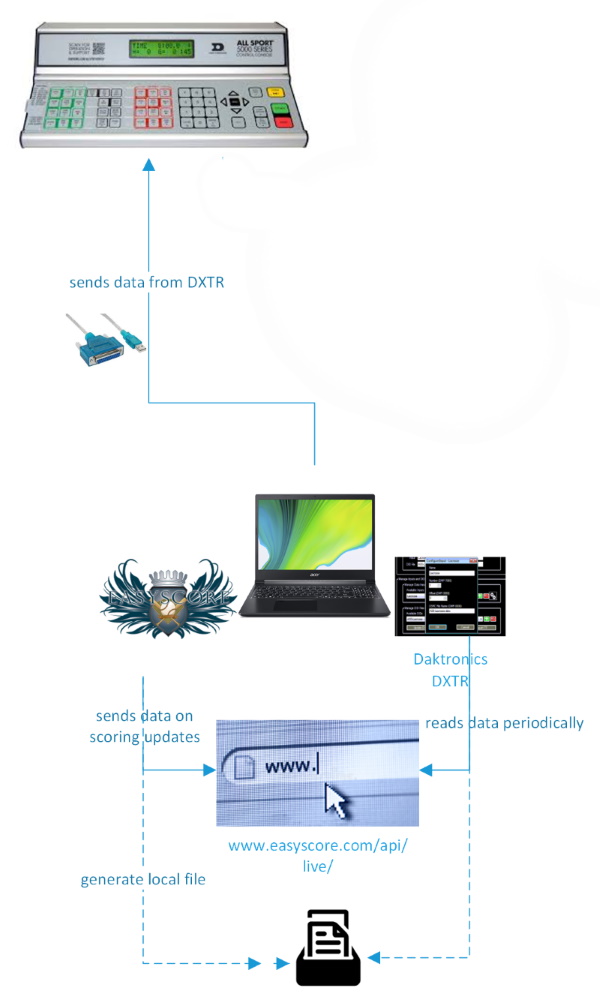
Step 1: Connect your laptop with the All Sport® 5000 Series controller
You must connect your laptop with a USB to DB25 Serial RS232 cable into the I/O port named J6 on the back of the controller:

Step 2: Install the necessary software
You will need the following software to be running on the same laptop from where you use EasyScore:
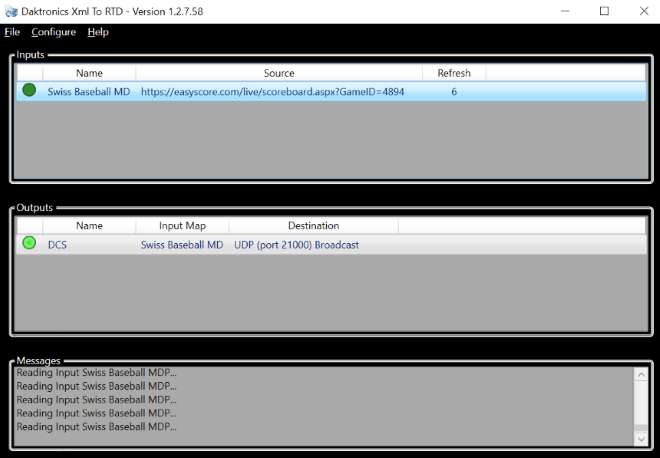
Step 3: Define all files
Input file
The input file is the source XML-file which contains the data from the game. EasyScore provides a special web address which is located at https://easyscore.com/live/scoreboard.aspx?GameID=XXXXX where XXXXX is the unique id of the game in EasyScore.
Output file
The output file maps the fields from the source XML-file into a format that can be read by the All Sport® 5000 Series controller.
This file must be placed at C:\ProgramData\Daktronics\DXTR\Maps\
This file can only be produced by Daktronics upon request.
Data Model Scripting file
This file contains special functions and is provided by Daktronics.
The file is located at C:\Program Files (x86)\Daktronics\DCS\Scripts\Custom\
Step 4: Set up files in DXTR and DCS
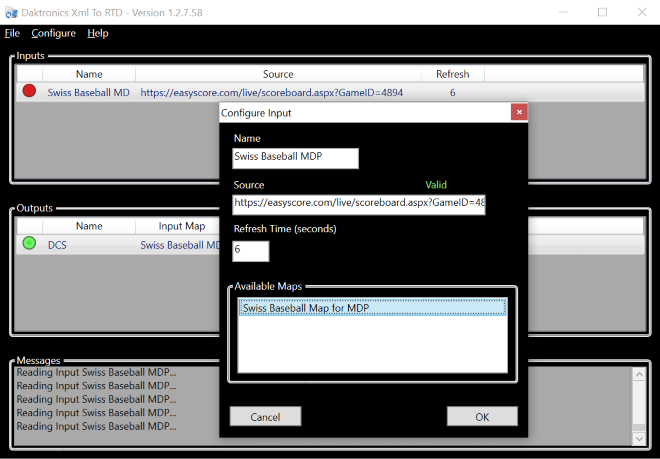
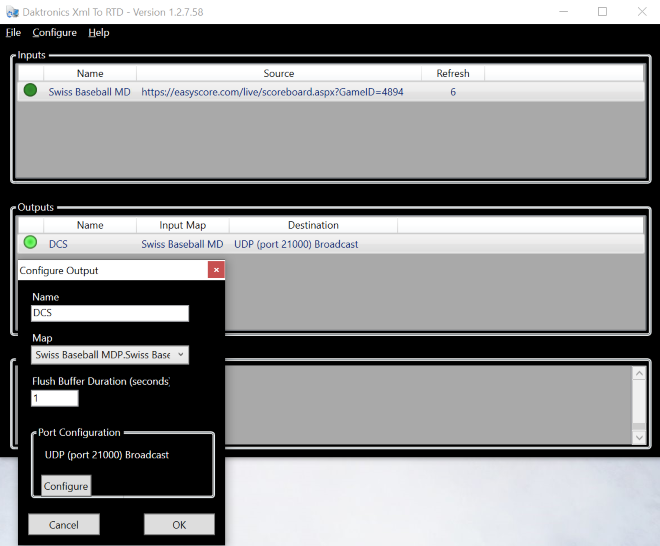
In DXTR, you will need to indicate the input and output files:
Choose "Configure Input" and make sure that the Map file is selected under "Available Maps":
Choose "Configure Input" and make sure that the Map file is selected under "Map":
In DCS, use the following setup:
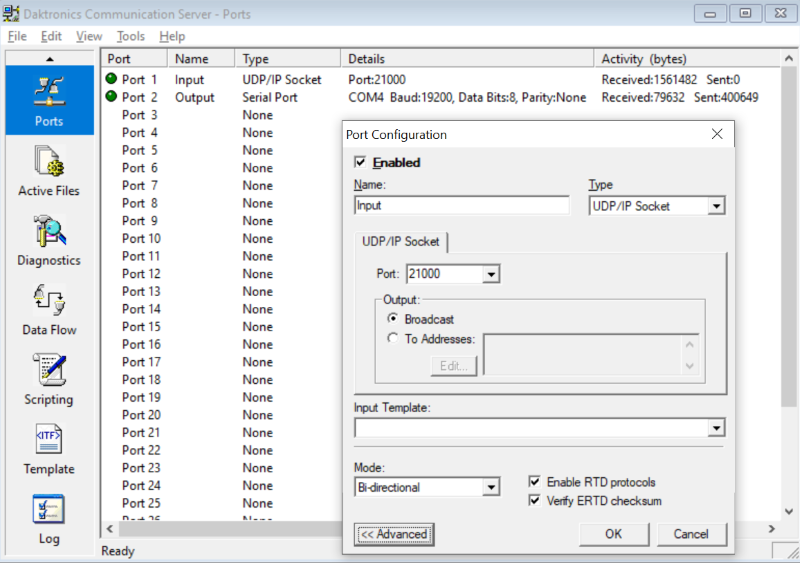
Under Ports, double click on "Port 1", name it "Input", select "UDP/IP socket" for Type, port "21000" for the UDP/IP socket and "Broadcast" for the Output:
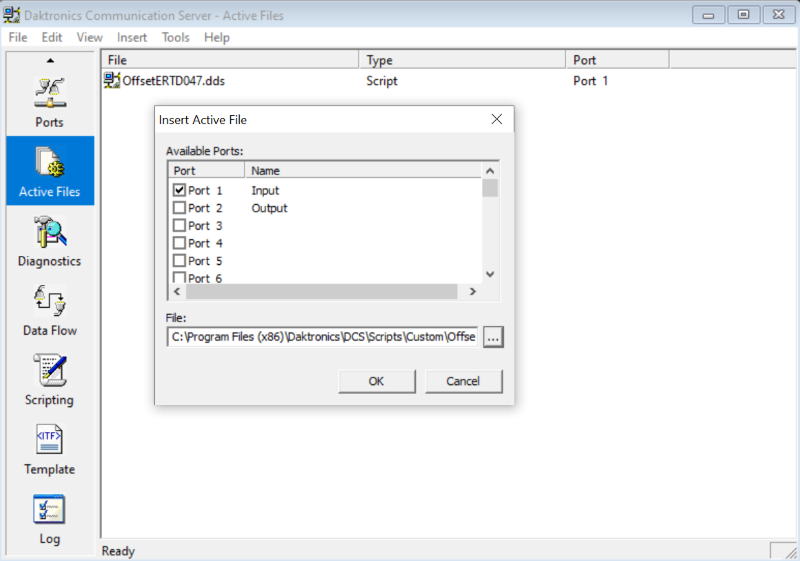
Under "Active Files", select "Insert..." from the top navigation, then check "Port 1" and select the Data Model Scripting file:
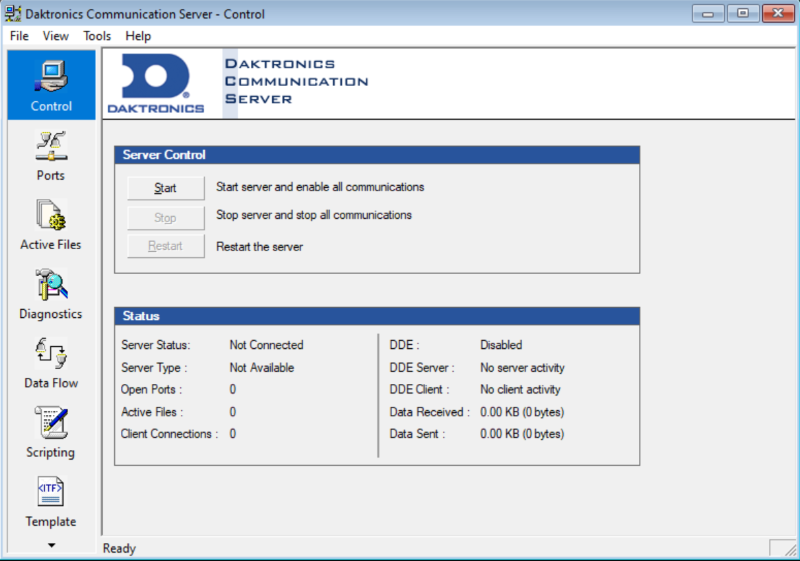
Under "Control", you can now start the DCS by clicking on the "Start" button:
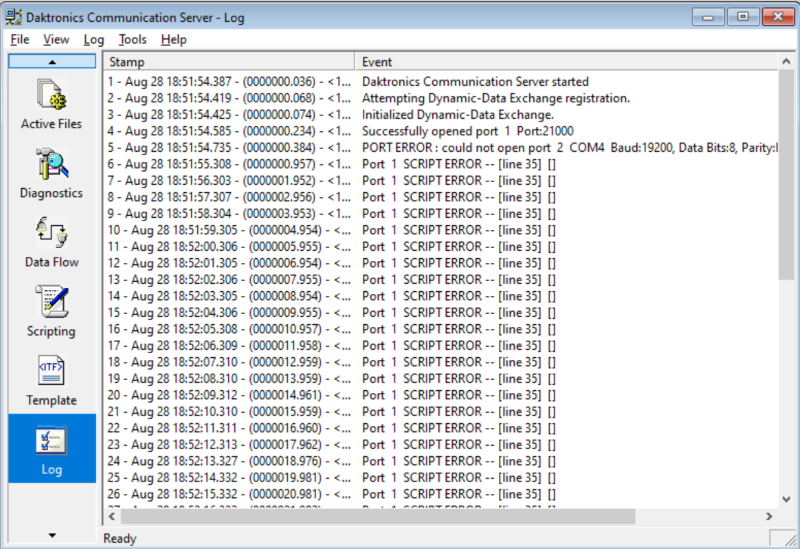
Under "Log", you can check if everything is running correctly:
If everything is setup correctly, you should now see changes made in EasyScore output directly to the scoreboard.
For further technical assistance, please contact support@easyscore.com.